
Project Info
Pattern: Harry Potter Gryffindor Style Blanket by Little Bean Sugar Co.
Yarn:
- Impeccable 100% Acrylic in Burgundy (3 skeins)
- Impeccable 100% Acrylic in Gold (2 skeins)
- Caron Simply Soft 100% Acrylic in Snow Sparkle (<1 skein)
- Lion Brand Basic Stitch 100% Acrylic in Lemonade (<1 skein)
While acrylic isn’t my favorite yarn to use, it is easily machine washable and the blocking is more permanent than with wool blends. Since I knew this was headed to a baby, I wanted to make sure the care instructions were as easy as possible for the parents.
Time to Completion: September 18 – October 31, 2020
Working part-time and being a student full-time means that my knitting speed on this project was quite slow. Despite it taking about 6 weeks to finish, this was a relatively quick project.
Project Notes: I began this project with the full intention that it be my first foray into the world of crochet. I have very little experience with crochet, knowing only the basic chain, but I consulted with folks who know how to crochet and they agreed that this would be a good beginning blanket for me to test out. Somewhat apprehensively I created my 100 link chain to start and googled YouTube videos on how to single and couple crochet. Not far into my first row I found myself inevitably lost and feeling like I was constantly hooking into the wrong link, or the wrong side of the link, how did crocheters make this look so easy?!
Luckily, I was reminded that I could always knit the main blanket, and then just crochet from there. This felt like a far safe solution so I referred back to the most recent baby blanket I had made to see how many stitches I would need to get the approximate width I was going for (183 stitches), reminded myself how to do a star stitch, and promptly began once again with slightly more successful results.

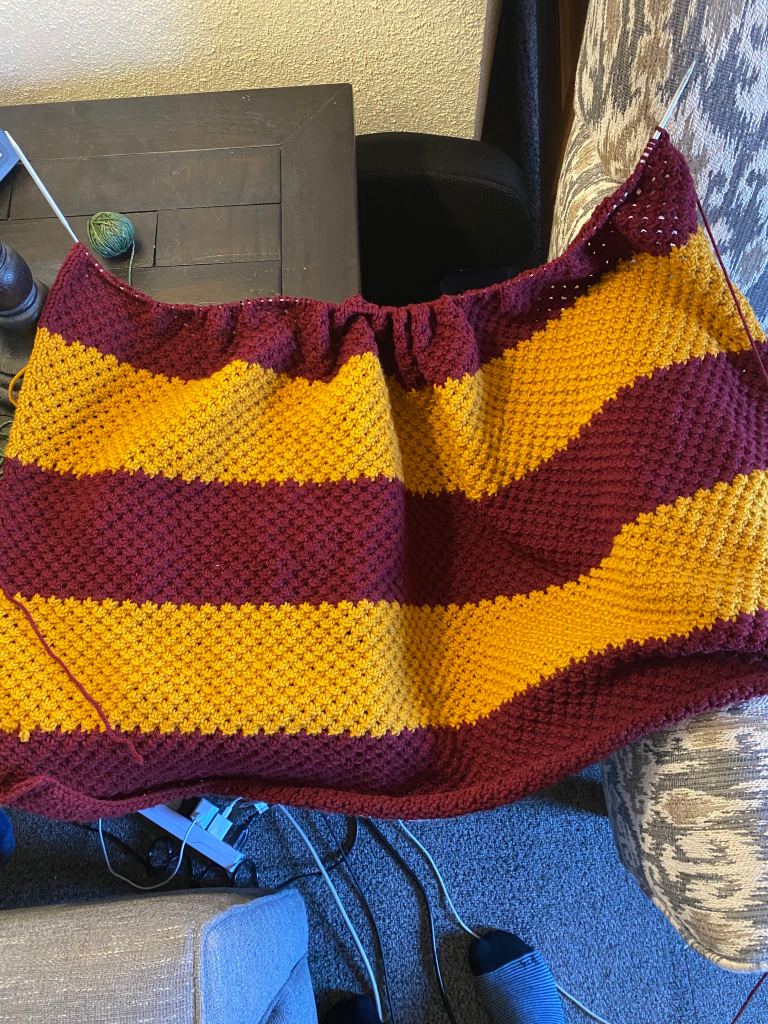

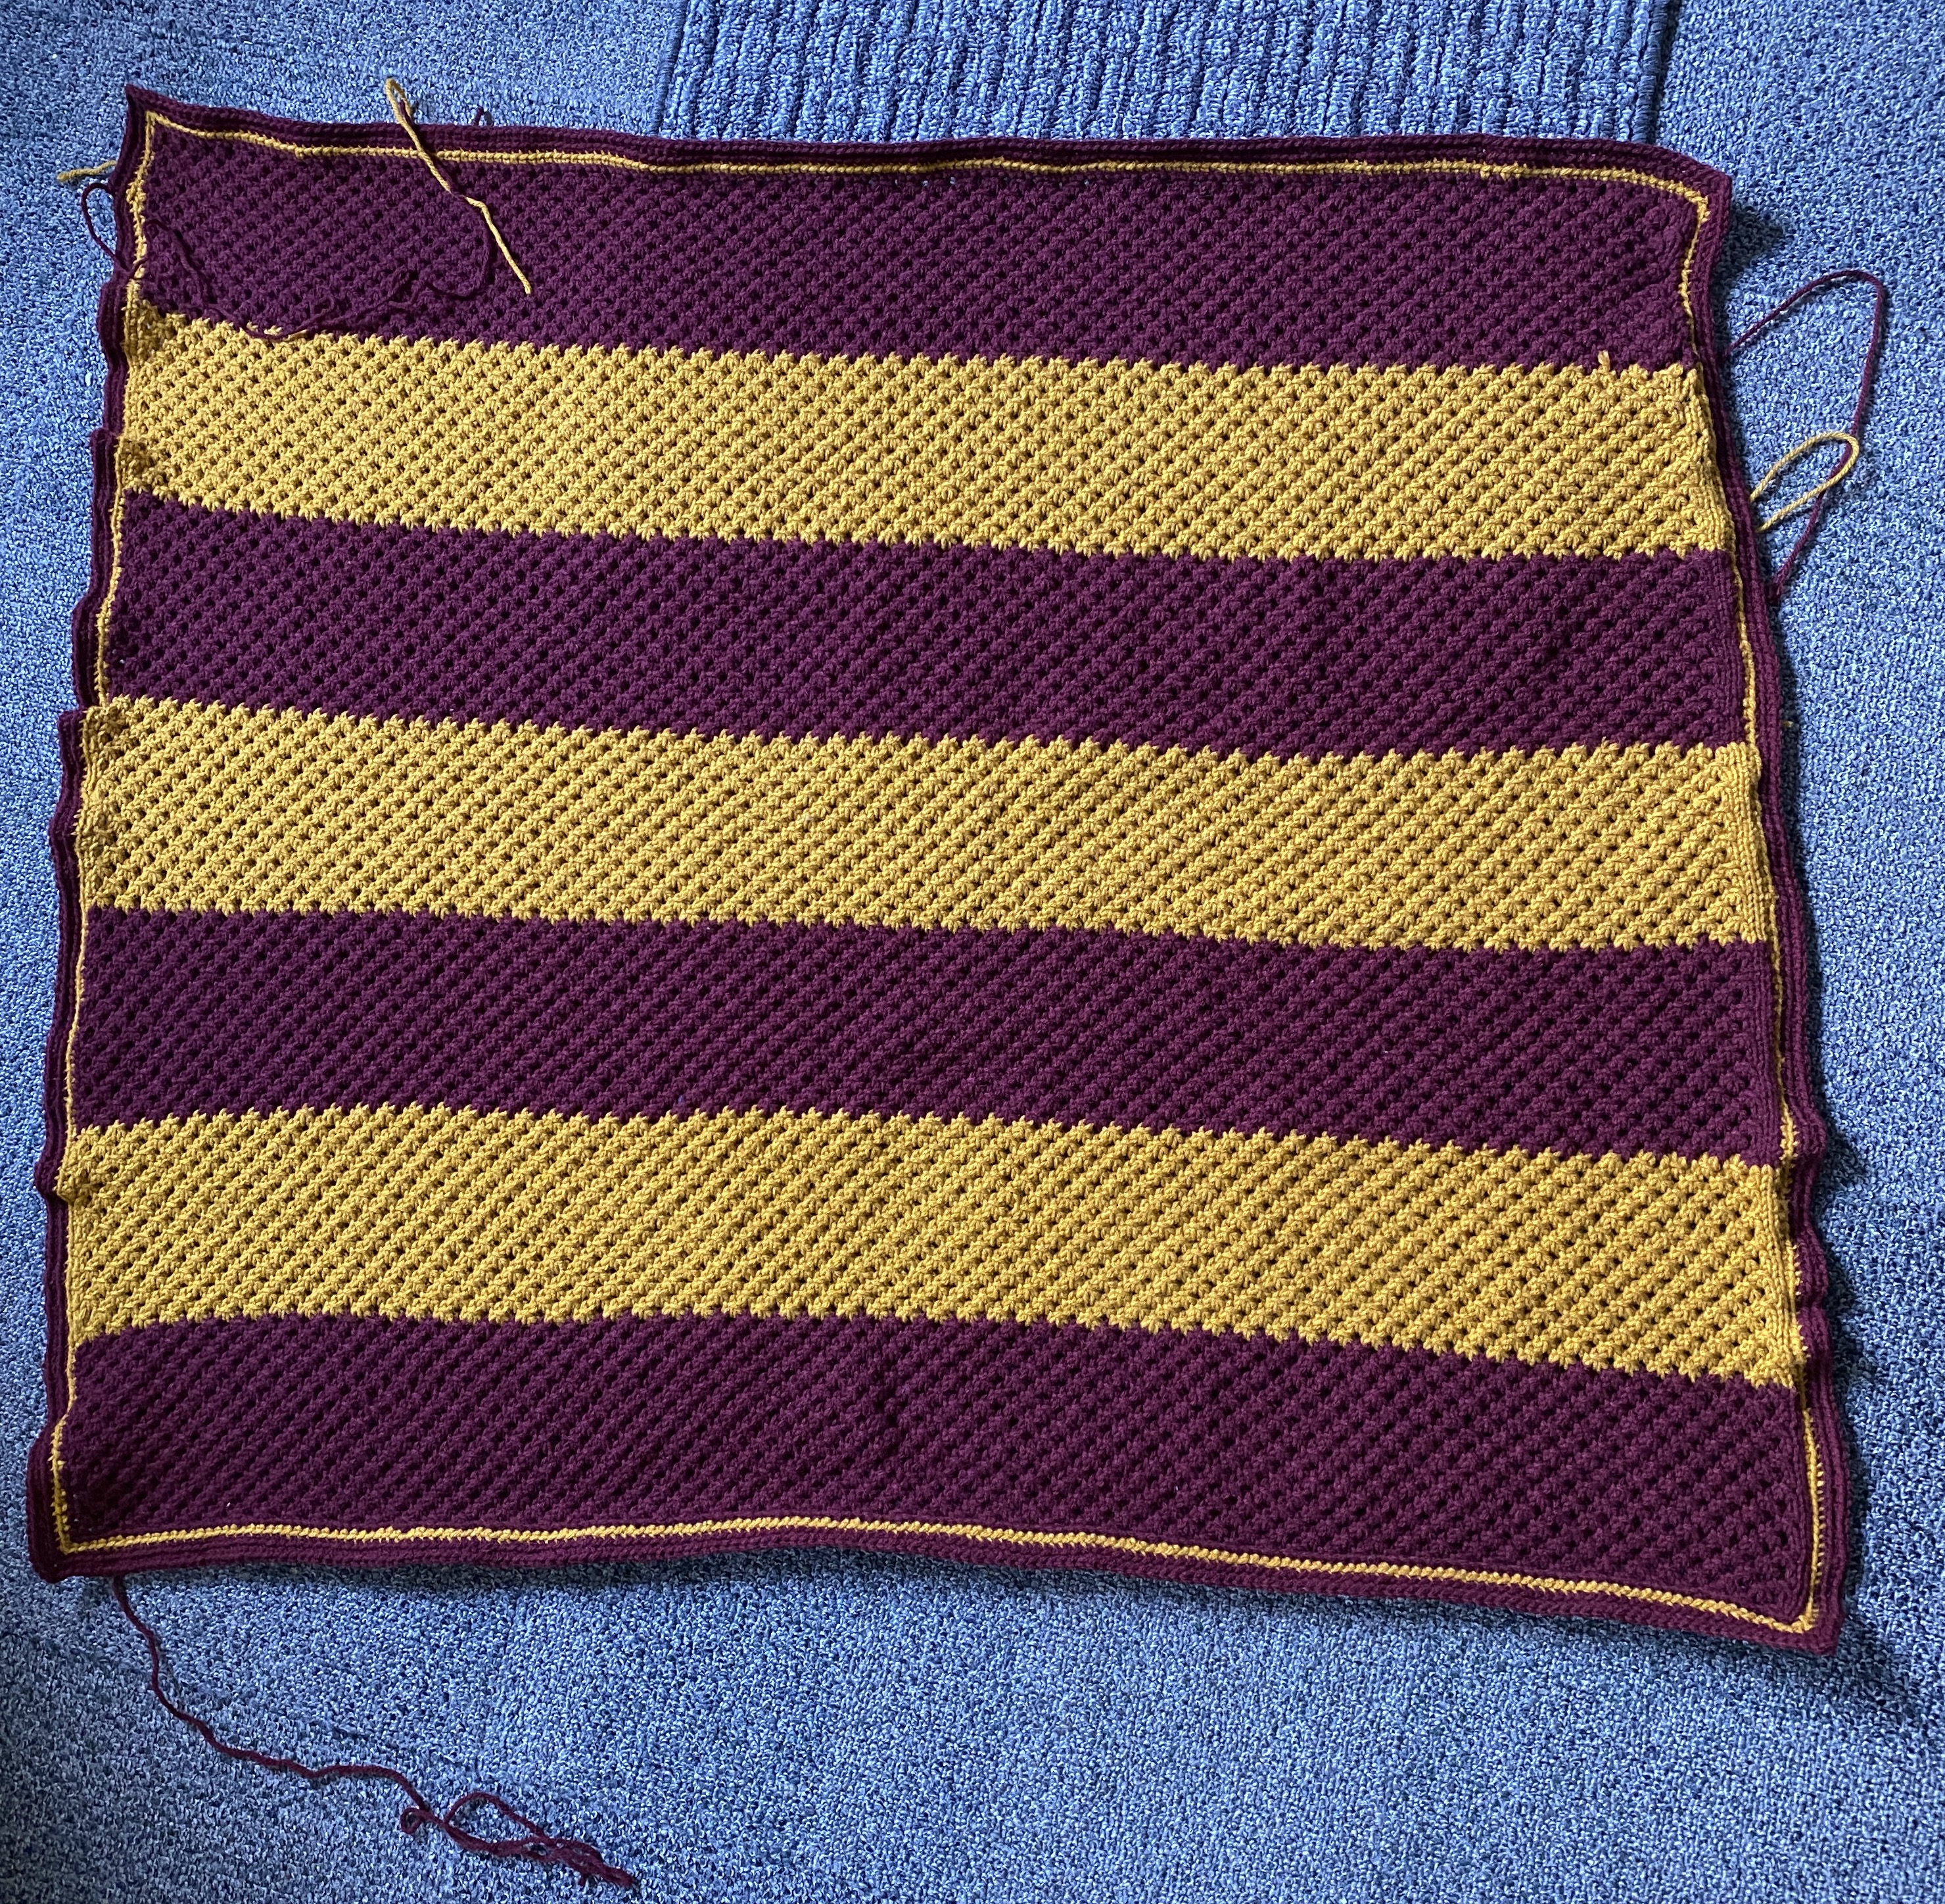
The pattern called for each color strip to be about five inches wide which equated to 30 rows of each color using star stitch. A few colors in, I realized I may have been remiss in not creating a gauge swatch, my blanket felt like it might be ill-proportioned if I kept the stripes in a horizontal pattern. I hoped that blocking would allow for corrections at the end so I continued. Once I had finished all of the stripes, I apprehensively picked up my crochet hook and hoped that this time around the single crochet stitch would be kind to me as I hooked on a border to the blanket.
Once the border was completed, I was then ready to create and determine the location of the snitch! Because the blanket ended up being larger than expected, and with my newly found confidence in crocheting, I worked my way through creating the snitch body and wings. The body ended up coming out too large (somewhere around the circle I lost count of my stitches), and the wings came out perfectly sized which meant they were a little small for my snitch body. Luckily, the blanket was also a little larger than expected due to my miscount on the star stitch, so I kept my snitch body and altered the snitch wing pattern by adding +2 stitched to all counts in the pattern (except for the ch1 instruction for turning the row on the right(?) side). This created a much large set of wings and I laid the blanket out and started moving the snitch around and crowdsourcing opinions on placement from my close friend group on Snapchat.
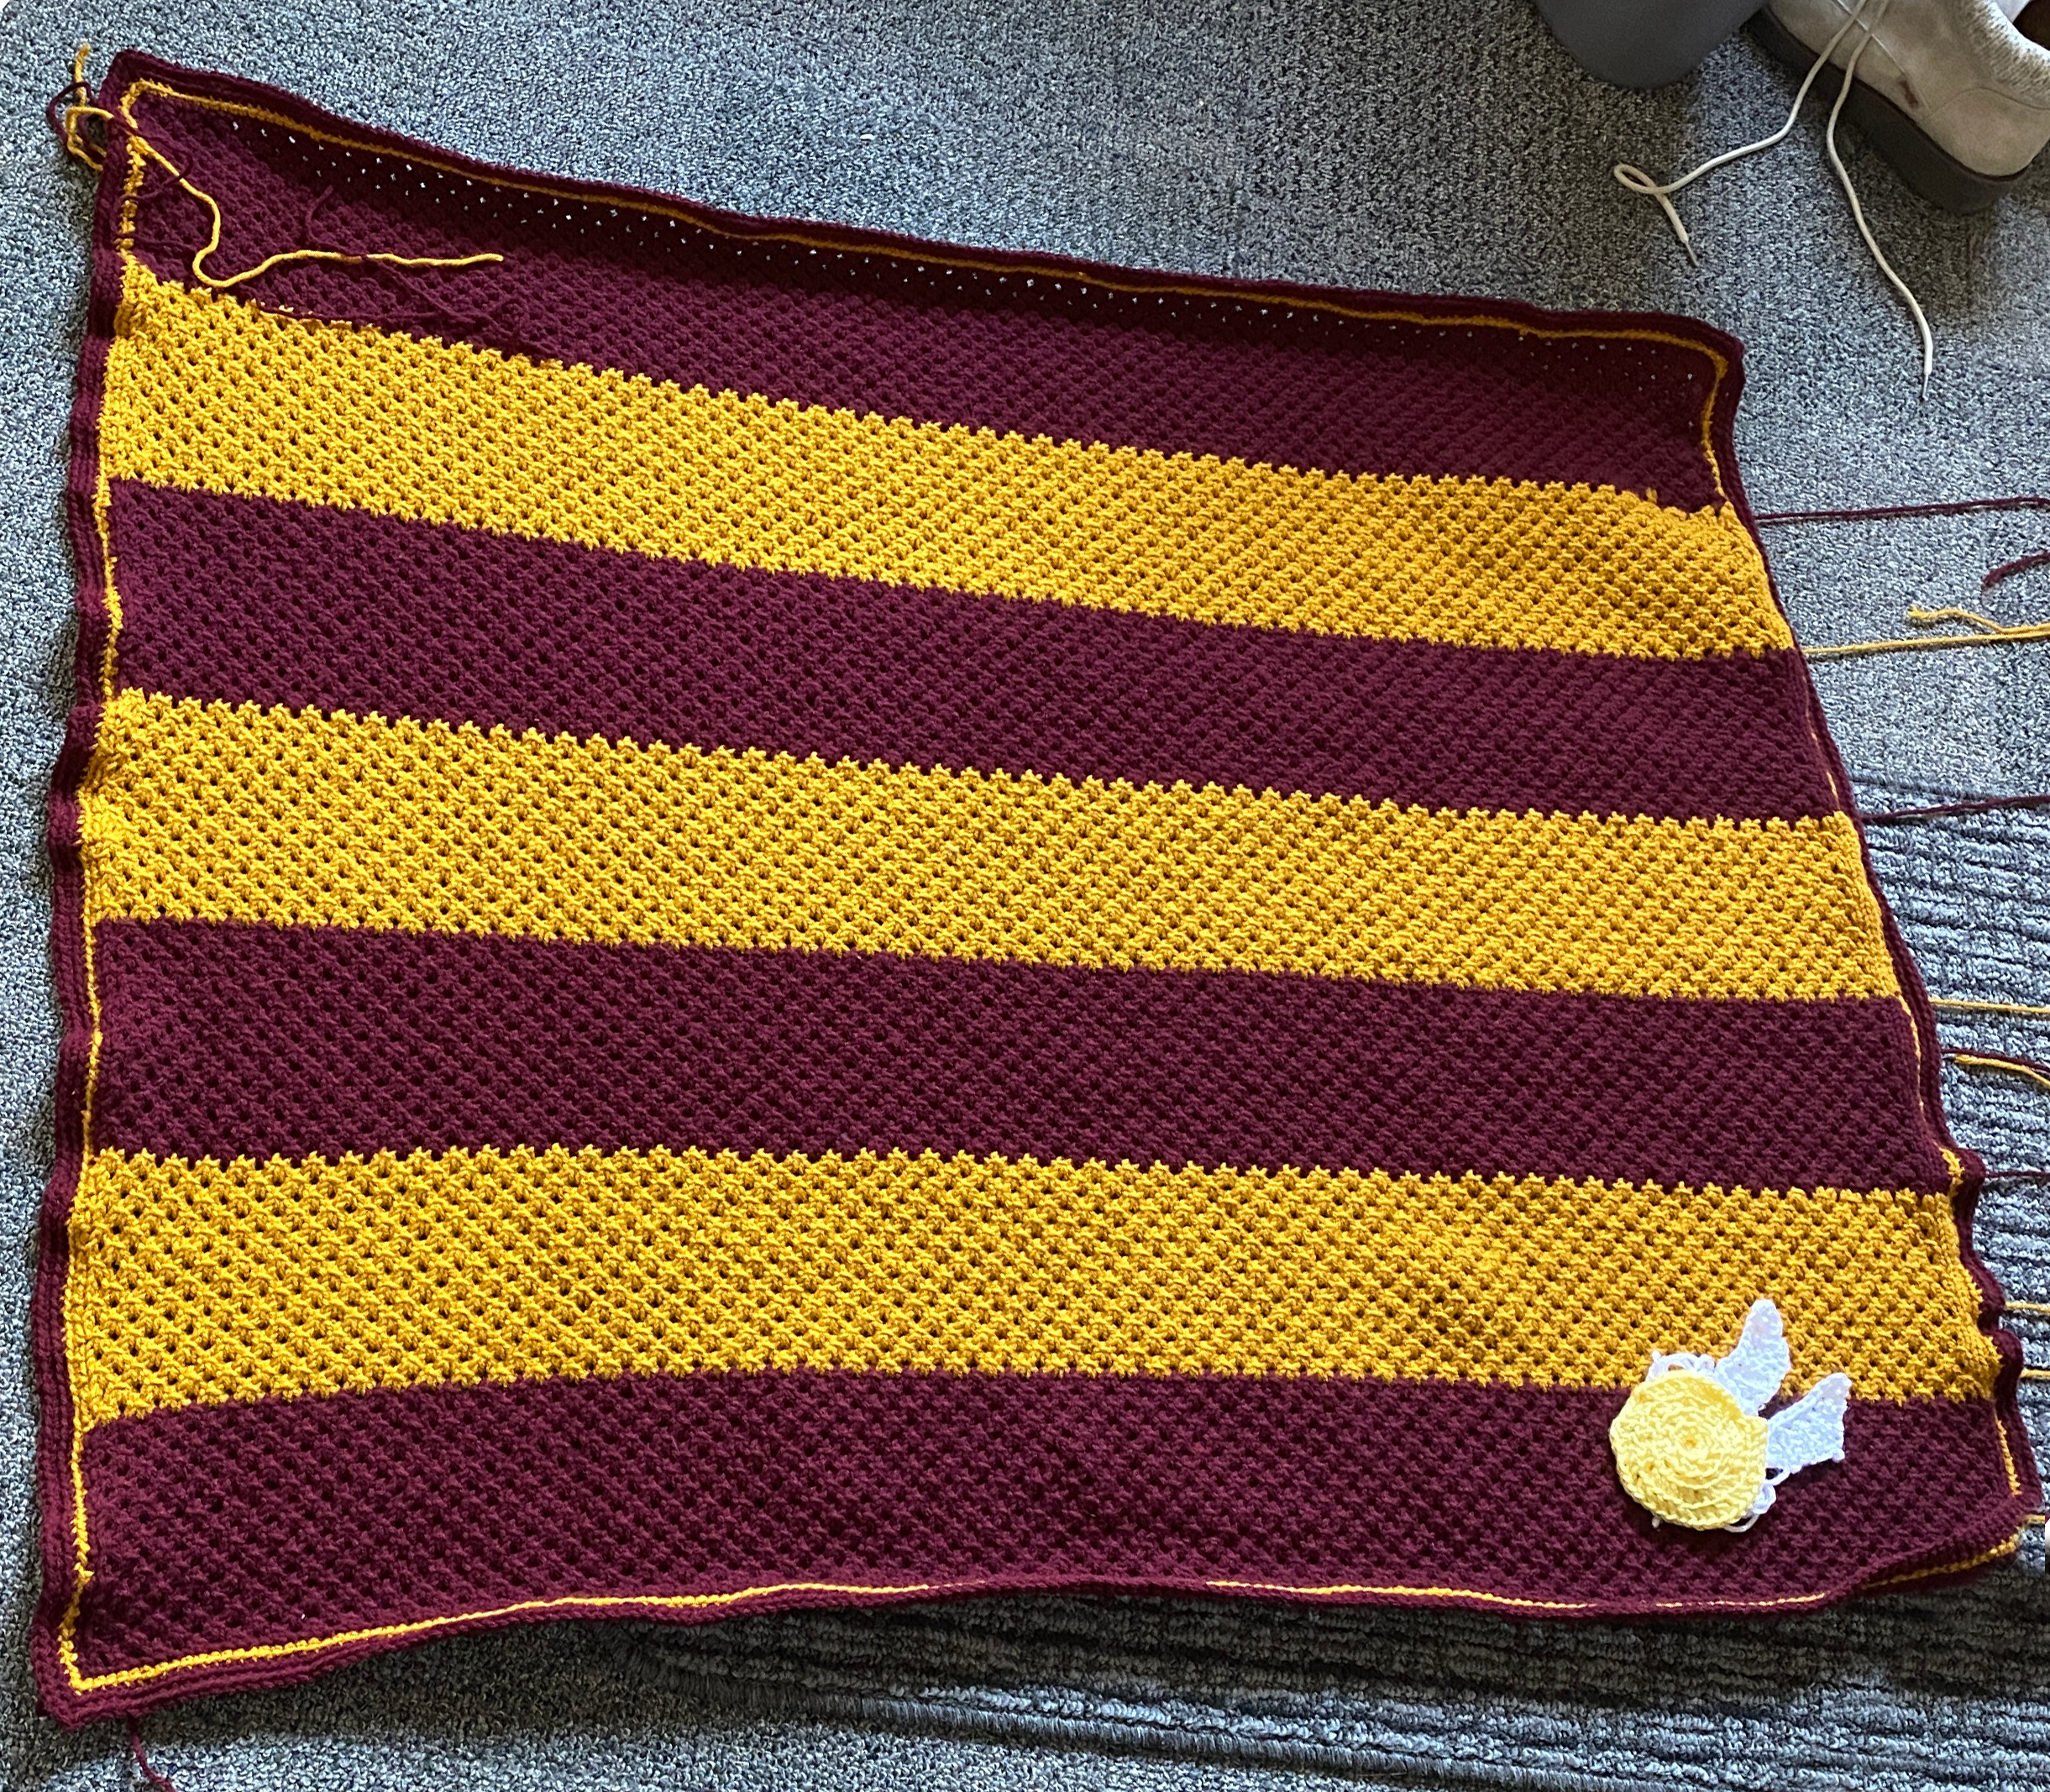

The vote back from my friends was inconclusive and the decision was made after it was pointed out that small children love making blankets into capes, and the vertical striped alignment was friendlier towards a cape aesthetic. The decision to put the wings on either side of the snitch evolved from spending a lot of time looking at snitches on the internet and decided which I like better.
I watched the latest This Is Us episode as I weaved in all of the tails throughout the project. A seemingly endless task that always goes much faster than expected. With the ends woven in I moved on to blocking the project.

Because of the puckered edges, I knew blocking the blanket would be essential, it would lie flat and look nicer as it always does after blocking. This was not my first time blocking acrylic, but I do have a tendency of under-blocking because of my fear of felting the project. So I put on a half hour video that I needed to watch for class, filled my iron with water, set it to steam and very carefully hovered it about 1 inch over every part of the blanket. As I went I flattened edges and slightly re-shaped sections to make sure it was forming how I wanted it to.
With the blanket blocked, it was time to add the label on the back! After doing some brief research on the internet, I decided to buy the Arteza fabric pens based on the good reviews it received and in the hopes that they wouldn’t wear off. I found some fantastic Harry Potter fabric and grabbed a friend with better handwriting than mine to inscribe “Congratulations on the newest addition to your quidditch team!” on the fabric before hand sewing it to the back of the blanket on the other side of the snitch.


One thought on “Harry Potter Gryffindor Style Baby Blanket”